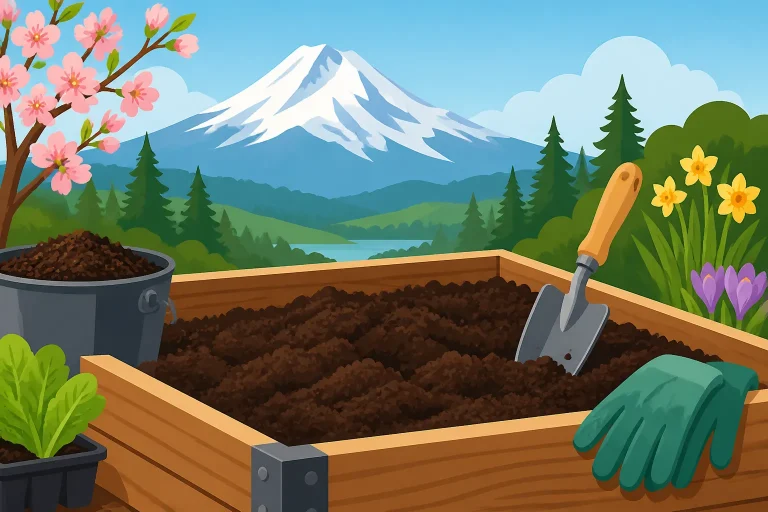
April Raised Bed Prep and Sowing Across Oregon
April is a useful time to get raised beds ready and begin sowing, but Oregon’s varied conditions make a single statewide planting schedule unreliable. The practical approach is to prepare soil only when it is workable, choose crops suited to current conditions, and let local weather—not the calendar alone—guide each planting decision.
What April Means for Raised Beds Across Oregon
April is a transition month in the garden, not a promise that every bed is ready for planting. A raised bed may drain and warm sooner than the surrounding ground, but its conditions still depend on recent rain, exposure, soil texture, and the weather pattern where you live. A sheltered bed in a mild area can be ready while a more exposed bed remains cold and saturated.
According to Oregon State University Extension Service, April is a time for fertilizing your lawn and preparing soil and raised garden beds. For gardeners, preparation is most useful when it responds to what is actually happening in the bed. A calendar can suggest when to start checking; the soil itself helps determine whether it is time to dig, amend, sow, or wait.
The differences across Oregon matter. Coastal gardens and many western areas can have cool, damp soil, while inland locations may experience larger swings between daytime warmth and chilly nights. Higher-elevation and high-desert gardens can face a shorter growing season and lingering cold. Those broad patterns are useful context, but they do not tell you the condition of a particular raised bed. A wall, slope, tree canopy, wind exposure, or cold-air pocket can make a small garden behave differently from nearby yards.
That is why April sowing works best as a sequence of decisions rather than a single planting day:
- Check whether the bed is wet, damp, or dry enough to work.
- Look at the crop’s instructions and the conditions it needs to germinate.
- Decide whether to sow outdoors, use a protected space, or wait.
- Keep notes about what you sow so you can track emergence and adjust.
For a broader picture of when different parts of the state tend to move through the season, see Finding the Right Planting Calendar for Your Part of Oregon. If you are comparing calendar guidance with frost information, Why Oregon Frost Dates Vary Across Weather Charts explains why a date on a chart is not a guarantee for your garden.
April can be productive even if the bed is not ready for every crop. Preparing a bed, organizing seed packets, checking soil moisture, and starting suitable cool-season sowings are all worthwhile. The goal is not to plant everything as soon as possible. It is to give each crop a reasonable start without compacting wet soil or exposing warmth-loving seedlings to conditions they cannot tolerate.
Check the Bed Before You Amend It
Before adding compost or fertilizer, inspect the raised bed and decide what it needs. Soil that looks dark or lumpy is not automatically in good condition, and adding more material without a reason can create new problems. Start by checking drainage, surface condition, remaining plant material, and moisture.
Wait for workable soil
A bed is easier to prepare when the soil is moist but not saturated. If it is so wet that it sticks heavily to a trowel, smears into a dense mass, or compresses into a slick clump, leave it alone and check again after it has had time to drain. Digging or turning waterlogged soil can break down its structure and leave compacted areas that are hard for roots and water to move through.
Raised beds often shed excess water more readily than flat ground, but they are not immune to waterlogging. A bed can stay wet if it sits over poorly drained ground, receives runoff, or has a compacted base. If standing water or persistently soggy soil is a recurring problem, investigate the cause before adding more soil amendments. How Raised Garden Beds Prevent Waterlogged Roots in Oregon Rains and Raised Garden Beds on Heavy Oregon Ground: Depth and Drainage cover drainage challenges in more detail.
If the soil is dry and crumbly, it may be workable, but dry soil can be harder to mix evenly with an amendment. Avoid turning dry, dusty soil simply because the calendar says to prepare a bed. If the surface is dry but the bed beneath it is damp, work gently and keep the soil structure intact.
Clear and inspect
Remove old crop debris that is diseased, badly damaged, or likely to interfere with new sowing. Pull weeds before they set seed, and remove roots that are easy to lift without disturbing the bed more than necessary. Healthy plant material may be suitable for composting, but diseased material should not be treated casually; local composting guidance can help you decide how to dispose of it.
Look for signs that the bed needs repair. Check whether boards or other edging have shifted, whether soil has washed from the surface, and whether the top layer has settled. If the bed has been covered, lift the cover carefully and check for slugs, weeds, and damp pockets underneath. If a cover has protected the soil from rain, the surface may be drier than it appears around the edges.
Check moisture below the surface
A dry surface does not always mean the bed is dry throughout. Press a finger or a small hand tool into the soil near the planned planting area. Look for a consistent level of moisture rather than relying on color alone. If the upper layer is dry and the soil below is also dry, gentle watering before sowing may help prepare a more even seedbed. If the lower layer is already wet, adding water can make conditions worse.
Moisture matters because small seeds need steady contact with damp soil to germinate, while overly wet soil can limit air around seeds and roots. The right balance depends on the bed, the crop, and the weather. Checking Garden Soil Moisture After Recent Pacific Northwest Rain offers a more detailed way to assess soil after wet weather.
Notice the bed’s exposure
The same bed can have different conditions from one side to another. A sunny edge near a wall may warm sooner than a shaded corner. A windy side can dry more quickly, while a low spot may collect cold air. Notice where rain reaches directly and where an overhang or nearby structure keeps soil sheltered.
Those observations are useful when you decide where to place seeds. Crops that need warmer conditions can be reserved for a warmer, more protected location later, while suitable cool-season crops can occupy areas that remain cooler. If you are unsure whether the bed’s conditions match the map or a general calendar, Why Your Garden Microclimate May Differ From the Map Zone explains how small site differences can matter.
Refresh Soil Without Overworking It
Raised-bed soil changes over time. It can settle, lose organic matter, become compacted in frequently used areas, or develop nutrient problems. The right response depends on what is happening, so treat soil preparation as maintenance rather than a routine of adding every available amendment.
Start with the bed’s history
Think about what grew in the bed and what was added previously. A bed that received compost recently may need little more than light surface preparation. A bed that has settled may need more soil material, while a bed with poor growth could have a moisture, light, pest, disease, or nutrient issue. Adding fertilizer without identifying the problem can waste product or create an imbalance.
If you grow vegetables in the same raised bed repeatedly, crop rotation can help you plan where plant families go from season to season. Rotation does not fix every soil problem, and it can be difficult in a small garden, but even a simple record of what grew where can help you avoid repeating the same pattern. See Rotating Vegetable Families to Stop Soil Disease Buildup for more on planning around crop families.
Add amendments with a purpose
Compost can improve soil structure and add organic matter, but it is not a universal substitute for a balanced soil mix or a specific nutrient plan. If the bed is already rich and plants have grown well, more compost may not be necessary. If the bed is low or the soil structure needs improvement, a suitable amendment may be useful. Choose it based on the bed’s condition and crop needs.
Do not assume that a larger amount of an amendment will produce a better bed. Excess compost can affect soil balance, and a bed filled mostly with compost may behave differently from one with a more suitable mix. For help comparing materials, Why You Should Avoid Filling Raised Beds With Compost Alone and How to Mix Loam, Compost, and Sand for Raised Garden Beds explain common mix decisions.
Fertilizer is also best used with a reason. Consider the crop, the soil’s history, and any available soil information before applying it. Follow the product label, which is the legal instruction for use. If you are uncertain about nutrient needs, a soil test can help replace guesswork with more useful information. Testing Garden Soil in Oregon: From Sampling to Lab Reports describes the testing process, while Matching Oregon Garden Fertilizer to Your Crops and Soil discusses how to think about fertilizer choices.
Avoid aggressive digging
Many raised beds do not need to be turned deeply every spring. Deep digging can disturb soil structure and bring buried weed seeds closer to the surface. If the soil is loose and healthy, gently loosen only the area where you will sow or transplant, and keep foot traffic off the growing surface.
If the bed has compacted, work carefully when the soil is in workable condition. A hand tool can loosen the top layer without repeatedly flipping the soil. If the problem comes from stepping into the bed, consider changing how you reach the planting areas rather than trying to correct compaction every spring. Vegetable Garden Bed Layouts: Row Spacing and Walkways offers ideas for keeping beds accessible without walking on the soil.
Make a seed-ready surface
Seeds need contact with soil, but a perfectly smooth surface is not necessary. Break up large clods in the planting area and remove stones or debris that could interfere with shallow sowing. Then firm the soil lightly with your hand or a tool so it is settled without being packed hard.
If compost or another amendment is added, blend it into the surface layer only as appropriate for the material and bed. Avoid burying fresh, undecomposed material directly in a narrow seed row. Large pieces can interrupt seed-to-soil contact, and uneven pockets of material can make moisture inconsistent.
The finished bed should be level enough for sowing and watering, but it does not need to look like a prepared display bed. A practical seedbed has a loose surface, stable soil underneath, and no large obstructions where seeds will go.
Choose Sowing Methods and Crops by Conditions
Choosing what to sow in April starts with the crop, not just the month. A seed packet can give useful guidance about sowing depth, spacing, and preferred conditions. Local weather and the state of the bed help you decide whether to follow those instructions outdoors, start seeds in a protected place, or wait.
Match each crop to its conditions
Cool-season crops are generally better candidates for early outdoor sowing than crops that need consistently warm soil and warm nights. The exact suitability depends on the crop and site. Check the seed packet or a reliable crop-specific reference rather than assuming that every vegetable belongs in an April bed.
If the packet describes direct sowing, that means putting the seed where the plant will grow rather than raising it elsewhere for later transplanting. Direct sowing can be convenient for crops that dislike root disturbance or are simple to establish in place. It also leaves the seed exposed to changing outdoor conditions, so the seedbed needs suitable moisture and protection from disturbance.
Transplanting starts offers a different set of trade-offs. A start has already begun growing, but it can still be stressed by cold, wind, wet soil, or an abrupt change from a sheltered setting to outdoor conditions. A transplant is not automatically safer than a seed. It needs a healthy root system and a gradual adjustment to the conditions it will face.
For crop-specific ideas about outdoor sowing, see What Vegetables to Direct Sow in April Garden Beds and When to Direct Sow Seeds Outdoors Across Oregon Regions. For help deciding between the two approaches, Starting Seeds Indoors vs Direct Sowing in Oregon Gardens lays out the practical differences.
Use the packet as instructions, not a forecast
A seed packet is useful for the variety’s basic growing requirements, but it cannot predict what the weather will do in your yard. Use its directions for sowing depth and plant spacing, then use local conditions to decide when the bed is ready. If instructions seem to conflict with a broad planting calendar, investigate the crop’s requirements and your site rather than treating either source as a universal rule.
Botanical Interests seed packets can be useful when you want variety-specific sowing and growing notes in one place. Whichever supplier you use, keep the packet for reference after sowing. It can help you remember what you planted and how the variety is expected to grow.
If you are choosing seeds for a short season or a cooler site, pay attention to the stated maturity information and the crop’s tolerance for cool conditions. Those details are not a guarantee of harvest, but they can help you compare options. Selecting Vegetable Crops That Truly Mature in Oregon Regions and Adjusting Seed Packet Days to Maturity for Chilly Nights explain why crop choice and local conditions affect whether a planting reaches harvest.
Decide between sowing now and waiting
If soil is workable and the crop is suited to cool conditions, sowing can be reasonable even if the forecast is unsettled. If the soil is cold and saturated, waiting may be more helpful than trying to gain an early start. If a crop needs warmer soil, delay outdoor sowing until conditions better fit its requirements.
A short delay does not necessarily mean losing the season. It may protect seeds from poor germination conditions and spare seedlings from a difficult start. If you want to use the bed while waiting for a warmth-loving crop, consider sowing a suitable cool-season crop in a space that can be cleared later, or keep the bed prepared and use a separate protected area for early starts.
When deciding whether a warm-season crop is ready, soil warmth is a better clue than a calendar date alone. When Is Soil Warm Enough for Tender Warm-Season Crops? and Minimum Soil Temperatures for Sowing Warm-Season Oregon Crops can help you think through that decision without treating April as a fixed signal.
Plan the bed around mature plants
A seedling can look small and leave the bed seeming empty, but the crop will need space as it grows. Follow the packet’s spacing instructions and consider how tall or wide mature plants may become. Keep pathways accessible, avoid sowing a dense strip that will be difficult to thin, and leave room to reach plants for watering, weeding, and harvest.
If you plan to sow different crops in the same bed, group them in a way that makes maintenance easier. Keep crops with similar needs together where practical, and avoid placing taller plants where they will shade crops that need more sun. A simple bed sketch can help you remember where each crop went and plan later sowings.
Succession sowing—making additional sowings as space becomes available—can spread harvests and reduce the chance that everything is ready at once. The timing depends on the crop, its growth rate, and available space. Succession Sowing Lettuce to Ensure a Continuous Harvest and Spreading Spring and Fall Spinach Crops for Steady Harvests provide examples of planning repeated sowings for particular crops.
Sow Carefully and Label What You Plant
Good sowing technique is mostly about following the seed’s needs, making even contact with the soil, and keeping the planting area from drying out or washing away.
Make rows or small planting pockets
For a row, draw a shallow furrow at the depth recommended for the seed. For scattered sowing, distribute seeds as evenly as practical over the intended area, then cover them according to the packet directions. Large seeds and small seeds do not always have the same depth requirements, so avoid using a single depth for every crop.
If you are unsure how deep to sow, check the packet before planting. Burying seed too deeply can make emergence difficult, while leaving it exposed can allow it to dry out or move. Sowing Depth for Small vs Large Vegetable Seeds in Oregon provides more guidance on adjusting sowing technique to seed size.
Place seeds with enough room for seedlings to develop. It can be tempting to sow extra densely when emergence is uncertain, but crowded seedlings compete for light, water, and space. If you do sow thickly, plan to thin carefully according to the crop’s needs rather than leaving every seedling in place.
Cover and firm gently
Cover the seed with loose soil or the appropriate material, following the packet’s directions. Then press the surface lightly so the seed has contact with the soil. Avoid crushing or compacting the bed. Gentle firming is enough; a hard, sealed surface can make it harder for seedlings to emerge and for water to soak in evenly.
Water gently after sowing if the soil needs it. A strong stream can expose or move seeds, especially when the bed surface is loose. Use a gentle flow or a watering method that reaches the soil without disturbing the row. The aim is to moisten the seed zone, not to flood the bed.
Label the sowing
Labels prevent an easy mistake: forgetting what went where before seedlings become recognizable. Write the crop and variety, if known, and note where the sowing is in the bed. If you keep a garden notebook, record the conditions too: whether the soil was damp, whether the bed was covered, and what the weather was doing around planting.
A label also helps you tell a slow germinator from a failed sowing. Germination rates and emergence times vary by crop and conditions, so consult the packet rather than assuming that a seed has failed after a brief wait. If nothing appears, check moisture, surface crusting, seed depth, and signs of disturbance before sowing again.
Keep seed packets somewhere dry after use. They contain useful details that may be hard to remember later, including variety information and crop-specific instructions. If you sow several crops in a short period, a simple written plan can prevent accidental resowing over a row that is already planted.
Protect New Sowing and Adjust After Weather
Freshly sown beds need steady attention, but they do not need constant disturbance. Check the surface after rain and wind, then respond to what you find rather than automatically watering or covering the bed every day.
Monitor moisture without saturating the bed
Seeds need moisture during germination, but a bed that stays waterlogged can be a poor place for seeds and young roots. Check the soil around the planting row, not only the surface of an exposed path. If the soil is still damp below the surface, additional watering may not be needed. If the seed zone is drying, water gently enough to avoid washing seed away.
Raised beds can dry faster than ground-level beds, especially in exposed or windy locations. That does not mean every raised bed needs frequent watering. Bed material, soil mix, crop, shade, and weather all affect how quickly moisture is lost. A reliable approach is to check the soil and water when the planting zone needs it.
For guidance on watering young plants, How Deep to Water Oregon Vegetables as Roots Establish explains how to think about water as plants grow beyond the seed stage. Watering Garden Starts Once or Twice Daily Until Established discusses the special care young starts may need, while still leaving watering decisions tied to actual conditions.
Use covers for a reason
A cover can help moderate conditions or protect young plants from weather, but it is not a substitute for choosing a suitable crop and planting window. Covers can also reduce light, trap excess heat in sunny conditions, or keep moisture from reaching the soil. Check beneath a cover rather than assuming the bed is fine.
If you cover a bed, secure the material so wind does not move it across seedlings. Make sure it does not crush the plants, and remove or adjust it when conditions underneath become unsuitable. A cover that is useful during a cold or windy spell may need attention when the weather changes.
Row covers and similar materials can also shelter pests. Check under them for slugs and other signs of damage, especially where the bed is damp. If you use a protective cover, make inspection part of your routine.
Expect uneven emergence
Seeds in the same row may not all emerge at the same time. Differences in seed quality, soil contact, moisture, temperature, and depth can lead to uneven growth. Give the crop enough time based on its instructions before deciding that a sowing failed. Avoid digging through the whole row to look for seed; that can disturb seeds that are still developing.
If emergence is patchy, note where seedlings appeared and compare those areas with the bed’s surface, shade, moisture, or drainage. A strip that stays wet or a spot that dries quickly may explain the pattern. You can fill gaps later if conditions remain suitable, but first check whether the original seeds are still emerging.
Once seedlings appear, keep the bed free of competing weeds and avoid disturbing their roots. Water gently at soil level when needed. As plants grow, thin or transplant only when the crop’s instructions and the seedlings’ condition support it.
Reassess after a cold or wet spell
If weather shifts after sowing, do not assume that every seed is lost. Check whether the bed is draining and whether the soil has crusted or washed. Correct only the problem you can identify. If seeds have been exposed, cover them again at the appropriate depth. If a row has been washed out, level the area gently and re-sow if conditions still suit the crop.
When temperatures or soil conditions turn unfavorable for a particular crop, waiting before making another sowing may be the sensible choice. A short pause can prevent repeated losses and give you time to protect the bed or choose a crop better suited to the conditions.
Common April Raised Bed Problems and Fixes
April beds can look ready and still behave unpredictably. These common problems are easier to manage when you diagnose what is happening before reaching for fertilizer, extra water, or another seed packet.
The bed is saturated
If soil sticks heavily to tools and collapses into a dense mass, postpone digging and sowing where possible. Check whether water is draining through the bed or entering from a nearby slope or roof runoff. Avoid adding more material until the underlying issue is understood. Repeatedly working saturated soil can make its structure harder to manage.
If the bed drains slowly every spring, consider whether its location, construction, or base is contributing. Using Raised Beds to Beat Wet Spring Soil in Western Oregon discusses how raised beds can help with wet soil and what to consider when setting them up.
Seeds disappear or seedlings are cut down
Seeds can be moved by strong watering, heavy rain, or animals. Young seedlings can also be damaged by pests. Look for evidence before re-sowing. A missing row may point to seed movement, while seedlings that emerge and then disappear may suggest feeding or other disturbance.
Use gentle watering, keep labels in place, and inspect the bed surface after rain. If slugs are a concern, look beneath nearby boards, covers, and dense plant debris. Managing Slugs in Vegetable Beds Without Toxic Pellets offers approaches to slug management, and Controlling Garden Slugs When Fall Rains Begin and Eggs Hatch discusses seasonal slug activity.
The soil surface crusts
A crusted surface can make it harder for seedlings to emerge, particularly when fine soil dries after rain or irrigation. Avoid breaking the surface deeply over a planted row. If the crust is thin, gently loosen only the surface in a way that does not disturb emerging seedlings. A layer of coarse material is not always appropriate for small seeds, so consider the crop’s needs before adding mulch over a newly sown bed.
Watering gently can reduce the chance of displacing seed and can help avoid repeated pounding of the soil surface. If crusting is a recurring issue, consider whether the bed mix is too fine or whether the soil is being disturbed more than necessary.
Seedlings emerge weakly or unevenly
Weak growth can have several causes: poor light, crowded seedlings, inconsistent moisture, unsuitable temperatures, or a problem with the seedbed. Do not assume that fertilizer is the immediate fix. Check whether seedlings are getting adequate light and whether the soil remains too wet or dries out. If the seedlings are crowded, follow crop-specific guidance on thinning.
If the issue continues or plant symptoms are unusual, compare them with reliable diagnostic guidance before applying a treatment. Diagnosing Plant Diseases and Garden Pests in Oregon can help you sort out possible causes, and Taking Clear Garden Photos for County Extension Diagnosis explains how to document a plant problem for assessment.
The bed seems ready, but the crop is not
A prepared bed is not necessarily warm enough for every seed. It can be tilled, amended, and well drained while still being too cool for a crop that needs warmer conditions. Keep the distinction clear: bed preparation makes the soil easier to plant; it does not change a crop’s temperature requirements.
If you are unsure what to sow, choose a crop suited to the current conditions or wait. When to Plant Oregon Vegetables: Using Soil Temperature and Season Clues offers a way to combine soil conditions and seasonal signs rather than relying on the date alone.
Frequently Asked Questions
Should I prepare every raised bed in April?
No. Check each bed separately. A bed that is wet, compacted, or already in good condition may need a different response from one that has settled or needs a fresh seedbed. Prepare soil when it is workable and make amendments based on the bed’s needs.
Can I sow seeds as soon as I add compost?
Not automatically. Make sure the compost is appropriate for the bed, mix or apply it as needed, and prepare the surface for the crop you intend to sow. Follow the packet’s instructions and consider whether the soil and weather suit that crop.
Is a raised bed warm enough for tender crops in April?
A raised bed may warm differently from the surrounding ground, but that does not guarantee suitable conditions for tender crops. Check the crop’s requirements and the soil conditions in your own bed. If the soil is still too cool, wait or use a protected growing space.
What should I do if seeds have not emerged?
Check the packet for the crop’s expected germination conditions and timing. Then inspect the bed for drying, waterlogging, crusting, seed movement, or disturbance. Avoid digging through the row. If conditions still suit the crop and the original sowing appears to have failed, you can decide whether to re-sow.
Sources
- Oregon State University Extension Service — Monthly Garden Calendars | OSU Extension Service (checked November 15, 2026)
Disclaimer
This article is for general informational purposes only and does not constitute professional advice. Laws, prices and regulations vary by location and change over time. Consult a qualified professional for guidance on your specific situation. Oregon Gardening Guide is not a government agency and is not affiliated with any university extension, state department of agriculture or other government agency.